Setup 360 Payments for version 9.15 and above
In version 9.15 of MaxxTraxx, setup for 360Payments processing has been slightly changed from it's original method.
The main difference are:
- Physical terminals and Virtual terminals have been separated from each other as two different terminal registrations.
- Virtual terminals do NOT need to be registered to a workstation to show as a payment option.
SETUP
- Go to Setups (gear icon on the top right) and select "Credit Card Setup (red "F" under ACCOUNTING)
- In Credit Card Setup, choose the 360 Payments tab at the top
- If pairing a new terminal, click "Add Credit Card Terminal" .
- If it is a Physical Terminal: add the Merchant ID and Physical Terminal ID numbers given from 360 Payments on their customer sheet given to us Columns H & I.
- If it is a Virtual Terminal: click the checkbox on the top left for "Virtual Terminal" and enter in the given 360 credentials Merchant ID stays the same as the physical. Add the Virtual Terminal ID (Column J) along with the Payment Token (Column N).
- Press OK and the terminal will then pair itself like usual
- You can add as many Physical Terminals as they have but the system should only have ONE (1) Virtual Terminal setup under the 360 Payments tab
- Please unpair any older virtual terminals before pairing a new one if multiple exist in the list
- Under "Assign Terminal to Workstation" the new method is you only need to pair PHYSICAL terminals ONLY to workstations
- the Virtual Terminal does NOT need to be assigned and will show as a payment option by default for all workstations
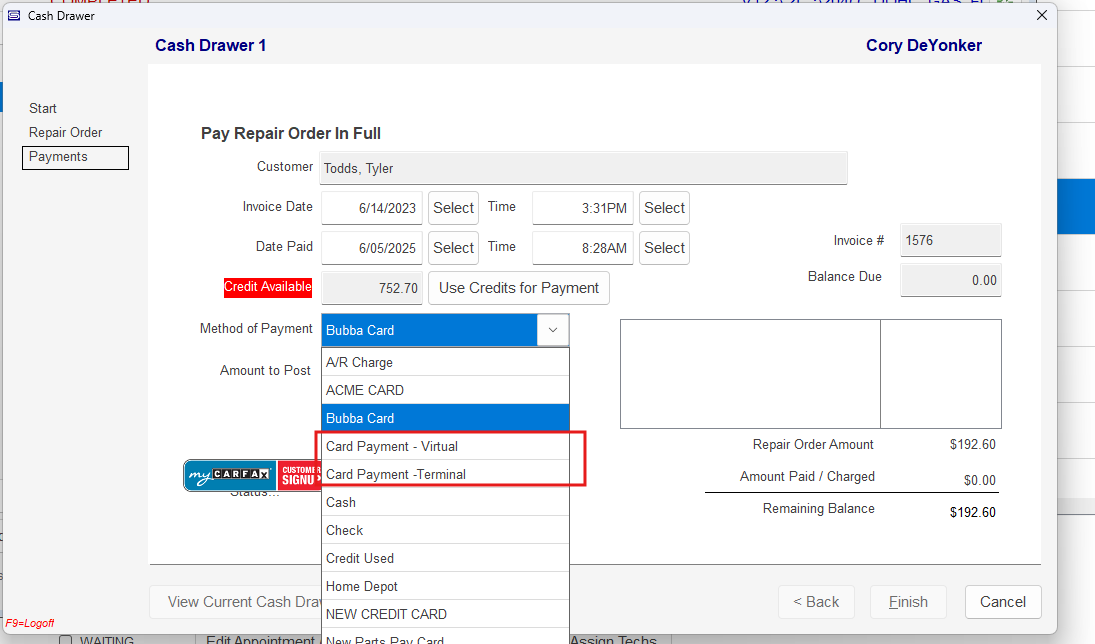
MAKING PAYMENTS
Payments work the same as in previous versions with the only difference being that if a Virtual Terminal was setup, you will see that as an option of payment by default without needing to assign it to any workstation
REMOTE PAYMENTS
REMOTE PAYMENTS
With 9.15 and above you can now send remote payments with 360
- In a open RO, go to Deposit on Account
- From Here you will see a new section above for Remote Payment Management
- To make a new one, click "Send Remote Payment Request"
- Fill this out and Hit Ok like a normal payment method
- If successfully processed, it will provide you a window with various ways to send the customer the remote payment link
- Text Message will work with both the older method of text messaging along with the future release of Twilio texting
- Email will open the normal email editor window with the default RO Invoice template and the payment link added on the bottom
- Copy Payment Link will copy the URL to your clipboard to paste in either an outside marketing program or directly into a web browser
- The "Manage Remote Payments" button on the main window always bring back this selection screen again in the future is you need to resend the link or Cancel the payment
- The window will attempt to check for any pending remote payments on first load but you can also click the "Check for Payments Received" to manually refresh this process
- When a payment link has been returned as successfully paid, MaxxTraxx will move the Pending payment from the top section to the Deposits and Credits Available list below
- From then on you can check Apply and use the Credit like usual to apply it to this Repair Order
Related Articles
MaxxTraxx and QuickBooks Integration Setup Guide
Overview Quickbooks Desktop and Quickbooks Online are two accounting software platforms offered to small businesses worldwide. The most commonly used version is QuickBooks Desktop, which runs locally on your computer. Intuit has also introduced ...Virtual Terminal and Remote Payments (Text/Email-to-pay)
To Request a Remote Payment from the Invoice Remote payment requests are recorded in MaxxTraxx as a deposit on account that can be run from the invoice or from the customer account. You may have as many outstanding remote payment requests as you need ...Oregon's Workers' Benefit Fund (WBF) Setup Instructions
This assessment is a payroll assessment calculated on hours worked in the quarter they are paid by employers. The WBF assessment requires employers to report and pay the Workers’ Benefit Fund (WBF) assessment for all paid employees subject to ...Repair Order and Part Invoices Setup
Repair Order and Part Invoices Setups are a bit lengthy but will help the users to see the various features in MaxxTraxx and help decide what they want to program to do. Have them navigate to the Setup Menu and click on Repair Order and Part ...Sales Tax Setup and Configuration
MaxxTraxx includes a built-in utility for configuring sales tax rates applied to parts and labor sales. This article explains how to set up and manage sales tax rates used on repair orders (ROs) and parts invoices. Accessing Sales Tax Settings 1. ...